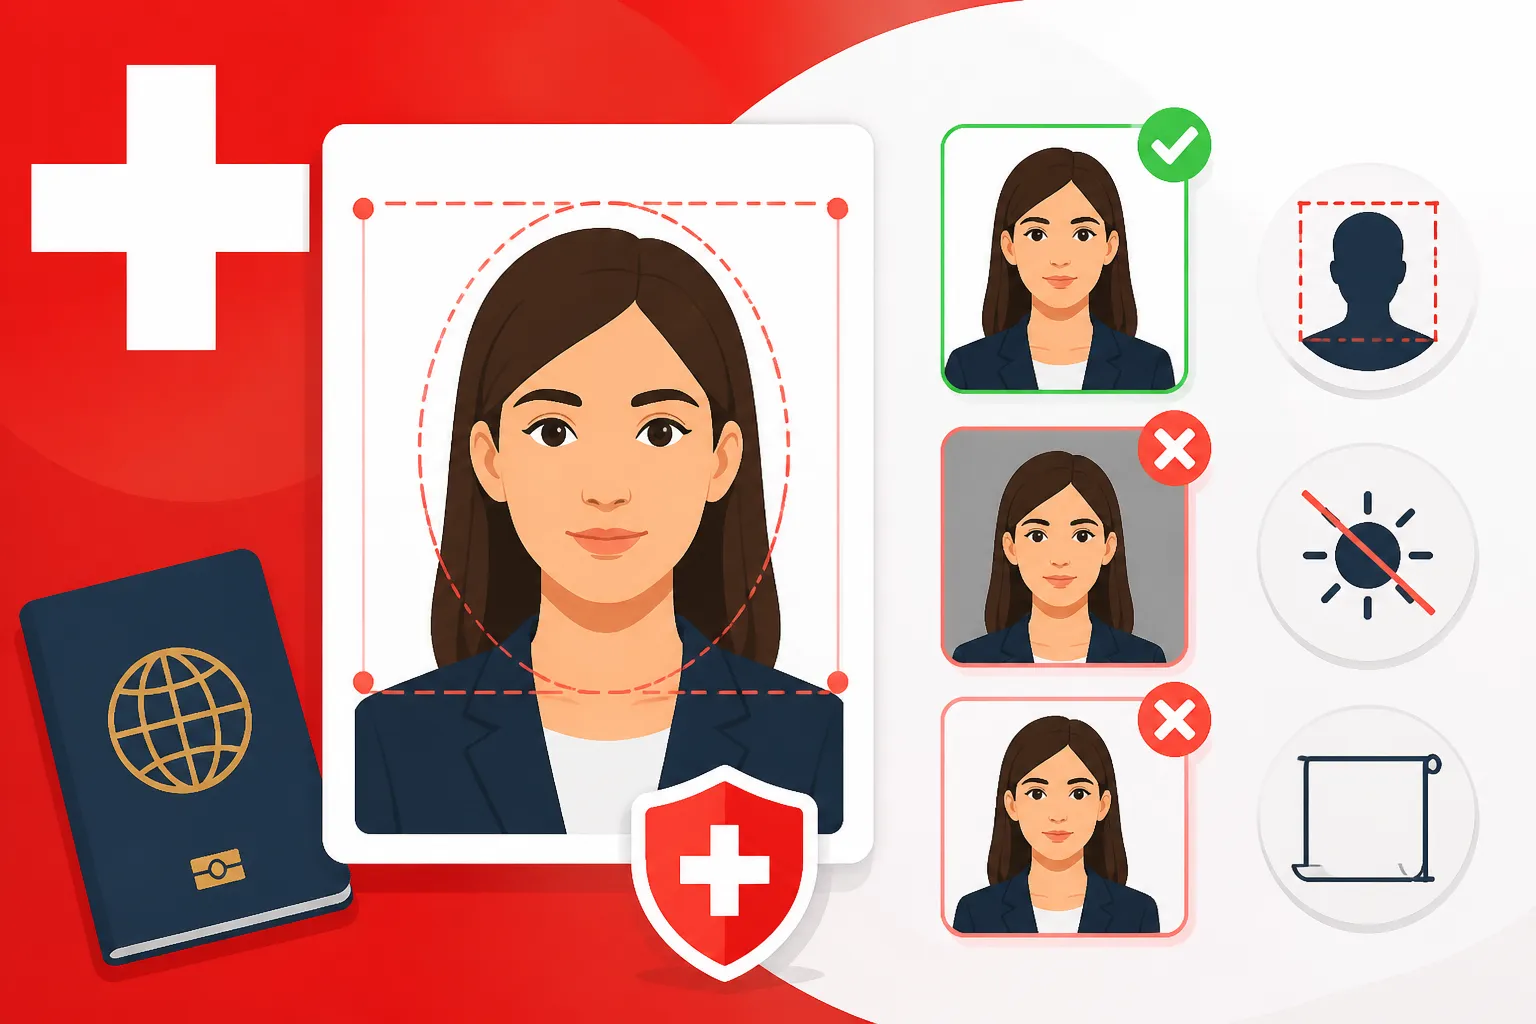
Passport Photos for Swiss Visas: Exact Size and Background Rules
Getting your Swiss residency paperwork in order often feels like trying to solve a Rubik's Cube where the colors keep shifting. I still vividly remember standing at the counter of my local town hall, hands trembling slightly, only to have my application pushed back across the glass because my photo had a tiny shadow behind my left ear. This guide solves the specific, high-stakes mystery of Swiss biometric photo requirements so you never have to face that rejection.
Why Swiss Precision Matters for Your Visa Photo
When you move to Switzerland, you quickly learn that "close enough" is not a phrase that exists in the local vocabulary. Whether you are applying for your initial entry visa or Registering at the Kreisbüro: What Documents Do Expats Need to Bring? after your arrival, the technical standards for your identification photos are non-negotiable. The Swiss authorities adhere to strict International Civil Aviation Organization (ICAO) standards, but they often apply them with an extra layer of scrutiny that can catch even seasoned travelers off guard.
In my first year, I thought I could save a few francs by using a photo I had left over from a previous visa application for another country. The officer at the migration office didn't even look at my contract or my proof of Healthcare in Switzerland for Expats: The Complete System Overview (2027) before pointing out that my head was tilted exactly two degrees too far to the right. It sounds like a joke, but in the world of Swiss administration, it is the reality. These photos are used for your biometric residence card, which serves as your primary ID for everything from opening a bank account to picking up a package at the post office.
If you are currently in the process of Family Reunification: Bringing Your Spouse and Children to Switzerland, the pressure is even higher. You aren't just managing your own photos; you’re managing those of your partner and children, all of whom must meet these exacting standards. Having a reliable service like RushTranslate to handle your birth certificates and marriage licenses is half the battle, but if the photos are wrong, the whole process grinds to a halt.
The Technical Dimensions and Head Proportions
The most fundamental rule is the size. A Swiss visa or permit photo must be exactly 35mm wide and 45mm high. While many countries use similar dimensions, the "head height" requirement is where most people fail. Your head—measured from the tip of your chin to the top of your crown (excluding hair)—must occupy between 29mm and 34mm of the vertical space. This means your face should take up roughly 70% to 80% of the photo.
Centering and Eye Level
Your face must be perfectly centered horizontally. The bridge of your nose should ideally be on the vertical center line. More importantly, there is a specific requirement for eye height. Your eyes should be positioned between 23mm and 31mm from the bottom edge of the photo. If you are using a DIY app or a local pharmacy in your home country, they might not be aware of this specific vertical alignment.
When I was helping a friend prepare her dossier for The Swiss B Permit: Eligibility, Renewal, and Restrictions, we spent an hour measuring her printed photos with a ruler. We realized that even though the 35x45mm outer dimensions were correct, her chin was too low in the frame. We had to go back and redo them. Swiss scanners are calibrated to look for eyes and chins in very specific zones; if they aren't there, the machine rejects the upload, and the human officer rejects you.
Resolution and Print Quality
In 2026, many cantons allow digital uploads for certain permit renewals, but for your first Residence Permits in Switzerland: L, B, C, and G Permits Explained application, you will almost certainly need physical prints. These cannot be printed on a standard home inkjet printer. The paper must be high-quality, "glacé" (glossy) or semi-matte photo paper. There should be no "half-tone" dots visible to the naked eye. If the photo looks slightly grainy or "pixelated," it will be rejected immediately.
Background Rules and Lighting Secrets
The background of a Swiss visa photo must be a neutral, light color. While white is often accepted, many Swiss migration offices actually prefer a very light grey. The key is contrast. There must be a clear distinction between your head and the background. If you have very light blonde or white hair, a light grey background is almost mandatory to prevent your head from "disappearing" into the backdrop.
Eliminating Shadows
This is the most common reason for rejection. You cannot have shadows on the background behind you, nor can you have shadows on your face. This requires "flat" lighting. If you are taking the photo yourself, you need a light source directly in front of you, but not so harsh that it creates "hot spots" on your forehead or cheeks.
I once saw a family get turned away during The 14-Day Registration Rule: Signing Up at the Gemeinde/Commune because the father's glasses cast a tiny, crescent-shaped shadow on his cheekbones. The officer explained that shadows can interfere with facial recognition software that maps the contours of the face. It felt pedantic at the time, but after living here for a decade, I understand that the system is built on this level of exactness.
Uniformity of Background
The background must be completely plain. No patterns, no wallpaper texture, and certainly no other objects or people in the frame. This is particularly difficult with infants and toddlers. If you are holding your baby for their first permit photo, your hands cannot be visible. Many parents find success by laying the baby on a light grey sheet on the floor and taking the photo from above, ensuring the lighting is even and no shadows are cast by the phone or camera.
| Feature | Requirement | Common Error |
|---|---|---|
| Width | 35 mm | Using 2×2 inch (US standard) |
| Height | 45 mm | Using 35×35 mm |
| Head Height | 29 – 34 mm | Head too small in frame |
| Background | Plain light grey or white | Shadows behind ears |
| Expression | Neutral, mouth closed | "Soft" smile or visible teeth |
| Eye Level | 23 – 31 mm from bottom | Head tilted up or down |
Facial Expression and Appearance Standards
Switzerland requires a "neutral expression." In many cultures, a pleasant, closed-mouth smile is considered neutral. In Switzerland, it is not. You must have a "neutral" mouth, meaning the corners of your lips should be flat, not turned up. Your eyes must be open and looking directly at the camera.
The Deadpan Look
Think of it as your most bored expression. Do not squint, do not frown, and do not raise your eyebrows. Both ears do not necessarily need to be visible (especially if you have long hair), but the edges of your face from temple to jaw must be unobstructed. If you are worried about your health coverage during the move, ensure your Cigna Global policy is active, as stress can often manifest as a tense expression in photos—take a deep breath and relax your facial muscles before the shutter clicks.
Hair and Headgear
Your hair should not cover your eyes or the edges of your face. If you have a long fringe (bangs), you may need to pin them back. As for headgear, it is generally prohibited unless for religious or medical reasons. If you wear a head covering for religious reasons, your face must be visible from the bottom of your chin to the top of your forehead. No part of the head covering should cast a shadow on your face.
If you've had to provide Translation and Apostille Requirements for Marriage Certificates using a service like RushTranslate, you already know how important it is to match the names on your documents to your physical ID. The photo is the final link in that chain. If you usually wear glasses but they have thick frames that obscure your eyes, the Swiss authorities highly recommend taking them off for the photo. Reflections on the lenses are an automatic "no."
Where to Get Your Photos Taken in Switzerland
You have three main options for getting your photos done once you are on Swiss soil, and each has its pros and cons.
The Fotomaton (Photo Booth)
You will find these in almost every SBB train station and in larger shopping centers like Migros City or Coop City. They cost around CHF 10-15 for a set of four. These booths are programmed with a "Swiss Passport/Visa" setting. They provide on-screen guides to help you align your eyes and chin perfectly.
- Pro-tip: The stools in these booths often spin to adjust height. Make sure you are at the right level so you aren't leaning forward or backward, which can distort your facial proportions.
Professional Photography Studios
If you are applying for The Early C Permit (Permis C Anticipé): Qualifying After 5 Years, you might want to invest in a professional studio. It will cost between CHF 40 and CHF 60, but they guarantee the photo will be accepted. They understand the lighting requirements better than any machine and will often give you a digital copy as well. For someone who has spent years building a life here, the last thing you want is a permit delay over a DIY photo mistake.
DIY and Mobile Apps
There are several apps that claim to crop your photo to Swiss standards. While these can work, the risk is higher. You must ensure the print quality is professional. If you go this route, take the photo in bright, natural (but indirect) light. Avoid using a flash, as it usually creates "red-eye" or harsh shadows. I generally advise against this for your first move, as you already have enough on your plate with Finding English-Speaking Notaries for Visa Documents in Switzerland and setting up your utilities.
Special Considerations for Children and Babies
Taking a biometric-compliant photo of a child is a task that requires the patience of a saint. For children under the age of five, the Swiss authorities are slightly more lenient regarding the "neutral expression" and "looking at the camera," but the size and background rules still apply.
For babies who cannot sit up yet, the best method is the "sheet on the floor" trick. Place the baby on a light-colored, non-textured blanket. Ensure there are no toys or pacifiers in the frame. If the baby's head is tilted, you'll have to keep trying. I spent three hours trying to get a photo of my six-month-old that didn't involve him crying or eating his own hand.
When you finally get that perfect shot, it’s a huge relief. It’s one of those "welcome to Switzerland" rites of passage. Just as you need a solid Cigna Global plan to feel secure about your family's health, you need these photos to be perfect to feel secure about your legal status. If you are struggling with the administrative burden, remember that Biometrics and Airport Immigration: What Happens at Swiss Border Control is much smoother when your paperwork is flawless.
Common Pitfalls That Lead to Rejection
Even if you follow the measurements, small details can trip you up. Here are the "hidden" reasons I've seen photos get rejected at the window:
- Over-retouching: Do not use "beauty filters" or any software to remove moles, scars, or wrinkles. The photo must be an accurate representation of you.
- Recentness: The photo must have been taken within the last six months. If you use the same photo you used for your entry visa a year ago to apply for your residence card, they will likely notice the date stamp or recognize the image from their database.
- Clothing: Avoid wearing white or light grey clothing, as you will blend into the background. Solid, darker colors provide the best contrast.
- Uniforms: Do not wear a uniform (unless it’s for religious reasons). This includes military-style clothing or even some corporate uniforms that might look official.
If you find yourself in a situation where your permit is delayed because of a photo, don't panic. Usually, the officer will give you a small slip of paper and tell you to come back with a new photo within a few days. However, this can be a major inconvenience if you’ve taken time off work or traveled from a remote village to the cantonal capital.
Final Steps Before Your Appointment
Before you head to your appointment at the migration office or the Einwohnerkontrolle, do a final check. Place your photo next to your current passport. Does it look professional? Is the lighting even? If you have any doubts, it is always cheaper and faster to spend CHF 12 on a new set of booth photos than to pay for a second trip to the government office.
Ensure you have all your other documents translated by a reputable service like RushTranslate if they aren't in German, French, or Italian. Having your ducks in a row—from your Cigna Global insurance card to your perfectly measured 35x45mm photos—will make the Swiss authorities view you as a well-integrated, organized resident. And in Switzerland, being organized is the highest form of flattery.
Disclaimer
This guide is intended for informational purposes only. Swiss visa and permit requirements are subject to change at the cantonal and federal levels. Always verify the latest specific requirements with your local migration office (Migrationsamt) or the Swiss State Secretariat for Migration (SEM) before your appointment. Medical and insurance advice should be sought from qualified professionals and your specific policy providers.