Reading Swiss Trail Signs: Yellow, White-Red-White, and Blue Markers
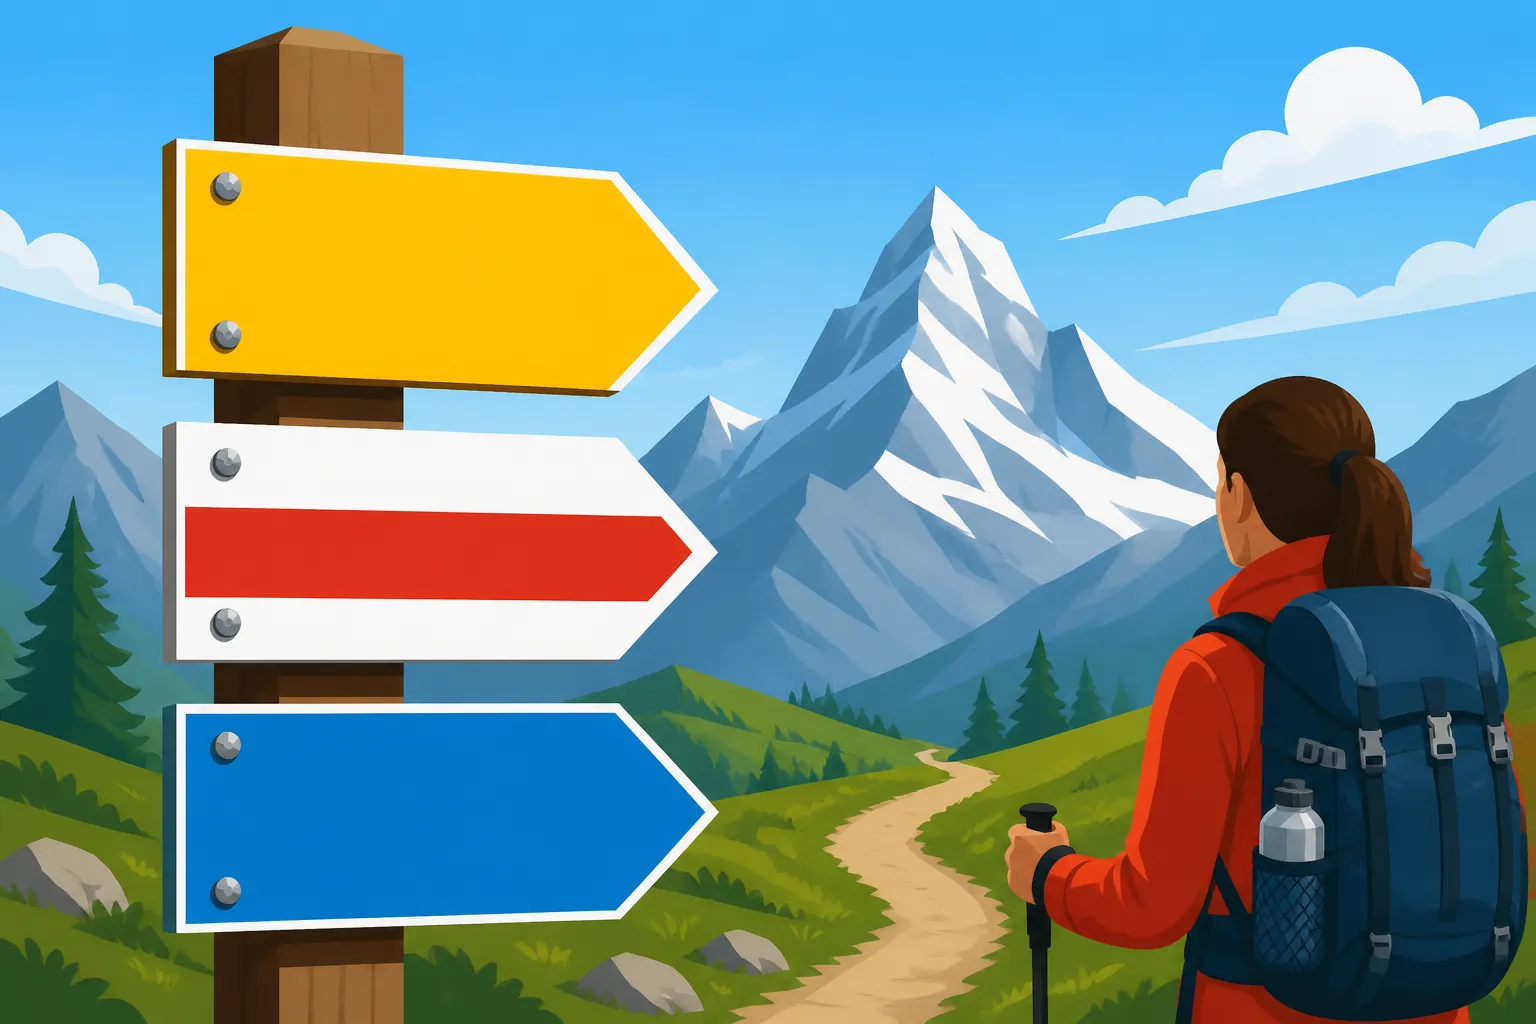
You’ve just arrived in Switzerland, eyes wide at the stunning mountains, and naturally, you’re eager to hit the trails. But then you see the yellow signposts, adorned with little hikers, time estimates, and curious color codes: some all yellow, some white-red-white, and a few even white-blue-white. It can feel like deciphering an ancient runic script at first glance, leading to confusion and, let's be honest, a bit of anxiety about accidentally ending up on a near-vertical cliff face. This guide is here to demystify the entire system, helping you confidently navigate the incredible Swiss hiking network.
The Universal Language of Swiss Hiking: Colors and Symbols
Forget what you think you know about hiking paths from other countries; Switzerland has its own incredibly organized, yet distinct, system. The colored markers aren't just decorative; they're a critical safety classification, telling you everything you need to know about the difficulty and demands of the trail ahead. Understanding these at a glance is your first step to a truly enjoyable, and safe, Swiss outdoor experience.
Yellow Signs: Your Everyday Wanderings
These are your bread and butter, your gentle introduction to the Swiss outdoors. When you see a plain yellow sign, often adorned with a walking figure, you're on a "Wanderweg" or "Promenade" – a standard hiking trail or a leisurely stroll. These paths are designed for the general public, from families with young children to seasoned hikers looking for a relaxed afternoon.
You'll find these yellow-marked trails everywhere: winding through picturesque villages, skirting the edges of sparkling lakes like Lake Lucerne or Lake Zurich, meandering through rolling vineyards in places like Lavaux, or leading to charming picnic spots in a forest. They're typically well-maintained, clearly visible, and often wide enough for comfortable walking side-by-side. The gradient is usually gentle, with no major technical challenges. You won't encounter exposed sections, tricky scrambles, or anything that would require specialized equipment beyond a good pair of walking shoes. Many of these trails are even suitable for sturdy strollers or those with limited mobility. Think of them as the Swiss equivalent of a pleasant park walk, just with significantly better views.
The time estimates on these yellow signs are quite reliable for an average walker, indicating the time it takes to reach the next destination at a steady pace, without significant breaks. It's the kind of trail where you can wear your fashionable sneakers, pack a light picnic, and simply enjoy the fresh air and stunning scenery without breaking too much of a sweat. They are perfect for those who are just starting their hiking journey in the country or anyone looking for a relaxed day out exploring the natural beauty without the adrenaline rush.
White-Red-White: The Mountain Hiking Standard
Now, if you spot a sign with a white-red-white stripe, pay attention. This is a "Bergwanderweg" – a mountain hiking trail. These are a step up in difficulty, seriousness, and the demands they place on you. This isn't just a walk in the park anymore; you're heading into proper mountain terrain.
These trails often lead to higher altitudes, crossing alpine pastures, rocky moraines, and sometimes even through patches of snow, even in summer. You might encounter steeper ascents and descents, narrow paths that cling to hillsides, or sections where you need to be particularly careful with your footing. While they don't typically involve actual climbing, you'll definitely need to be sure-footed, have a good head for heights (at least moderate ones!), and possess a decent level of physical fitness. Proper hiking boots with ankle support are absolutely essential here – leave those sneakers at home! Carrying a backpack with water, snacks, extra layers for unpredictable mountain weather, and a basic first-aid kit is non-negotiable.
The white-red-white markers signify that while the path is clearly marked, the terrain itself is more challenging. You might need to use your hands for balance occasionally, step over roots or rocks, and be prepared for changes in weather that can happen quickly in the Alps. These trails offer truly spectacular panoramic views and lead to some of the most iconic spots, but they require respect and preparation. Many classic Swiss alpine experiences, such as traversing passes or reaching mountain huts, fall under this category. It's crucial to check weather forecasts rigorously before embarking on a Swiss Hiking for Beginners: Trail Grades and the SAC System and to inform someone of your route and estimated return time.
White-Blue-White: The Realm of Alpine Adventures
This is where things get serious, and quite frankly, if you're asking about what these signs mean, you probably shouldn't be on a white-blue-white trail unless you've done significant research and preparation. These markers signify "Alpinwanderwege" – alpine routes. This is not hiking; this is bordering on mountaineering and often involves elements of climbing.
White-blue-white trails are extremely demanding, leading through very exposed, often glaciated or highly rocky terrain. You will encounter sections that require harnesses, ropes, ice axes, crampons, and other specialized climbing equipment. There might be fixed ropes or chains to hold onto, but these routes demand absolute sure-footedness, no vertigo whatsoever, excellent physical condition, and significant experience in alpine environments. Many sections involve scrambling where you are actively using your hands and feet to ascend or descend. These are often unmarked in the traditional sense, with only painted blue dots or small cairns guiding you through trackless terrain.
These are routes for experienced mountaineers, often leading to unmanaged peaks, across glaciers, or through challenging via ferratas. If you're unsure, or if you're not equipped with the full array of safety gear and expertise, turn back immediately. Attempting a white-blue-white route unprepared can be incredibly dangerous, leading to serious injury or worse. For most expats, especially those new to alpine sports, it's best to gain substantial experience on white-red-white trails and perhaps even hire a certified mountain guide for your first foray into these true alpine adventures. This is not the place for casual exploration; it's a domain that demands respect, expertise, and a thorough understanding of Mountain Safety in Switzerland: Weather, Gear, and Emergency Numbers.
Beyond the Colors: Understanding Additional Information on Trail Signs
The color coding is just the beginning of the story that Swiss trail signs tell. They are packed with essential information, and knowing how to interpret the rest can make all the difference between a delightful journey and an unexpected detour into the wilderness. These details are your navigational compass, guiding you even when GPS signals falter.
Time Estimates and Destinations
Swiss trail signs are famous, or infamous, depending on your pace, for their time estimates. These numbers, always displayed in hours and minutes, indicate the typical walking time for an average hiker to reach the listed destination. The "average hiker" here is assumed to be reasonably fit, walking at a consistent pace, and not taking long breaks for photos, snacks, or simply to admire the view.
It's a common expat experience to find these times a bit ambitious at first. Don't be discouraged if you take longer! Factors like your fitness level, the weight of your backpack, the terrain, and how often you stop can significantly alter your actual hiking time. If you're walking with kids, or if you plan on frequent photo stops, always add a generous buffer to the listed times. A sign might list 1h 30min to the next mountain hut, but for a family with young children, that could easily stretch to 2.5 or 3 hours. Always plan your route, considering your own capabilities and the time of day, especially if you're on a longer trek where daylight is a factor. Multiple destinations on one sign mean that all listed places can be reached via the path you're looking at, with the times indicating the duration to each specific point along that route.
Route Numbers and Local Maps
Beyond the names of towns and mountain peaks, you’ll often spot route numbers on the yellow signs. These numbers correspond to Switzerland's official national, regional, and local hiking routes, which are meticulously managed by SwitzerlandMobility. These range from iconic long-distance paths like the Via Alpina and Long-Distance Trails Across Switzerland to cantonal and local themed routes.
Understanding these numbers is key, especially if you're tackling a multi-day hike or want to explore a specific region systematically. For instance, you might see "Route 1: Via Alpina" on a sign, followed by "Grosse Scheidegg 3h 15min." This tells you not only the next major point and its estimated time but also that you're currently on a specific, nationally recognized long-distance path. Always cross-reference these numbers with a good map, either a physical paper map or a digital one via the official SwitzerlandMobility app or platforms like Komoot. These apps are invaluable for confirming your position, checking elevation profiles, and understanding the broader context of your hike. Relying solely on signs without a map can lead to confusion, especially at junctions where multiple routes converge or diverge. Knowing the route number you intend to follow gives you an extra layer of confidence in your navigation.
Hazard Warnings and Detours
Even on well-maintained yellow trails, conditions can change. The Swiss system is proactive about informing hikers of potential dangers or changes to the path. You might encounter temporary signs, often bright orange or red, indicating detours ("Umleitung"), path closures ("Weg gesperrt"), or specific hazards like rockfall ("Steinschlag"), slippery sections ("Rutschgefahr"), or areas with logging activity ("Holzfällerarbeiten").
These warnings are not to be taken lightly. The Swiss take mountain safety incredibly seriously, and these signs are put up for a reason. Always read and heed them. If a path is closed, it's closed for your safety. Do not attempt to bypass such warnings, as you could be putting yourself in significant danger or even facing fines if you trespass on closed sections. Similarly, if a sign warns of slippery conditions, it's a cue to proceed with extreme caution or reconsider your route, especially after rain or in colder temperatures. The responsibility for assessing conditions and making safe choices ultimately rests with the hiker. While the signs are excellent guides, your own judgment and preparedness for What to Pack for a Day Trip to the Swiss Alps are your most important tools.
Planning Your Swiss Hike: From Trailhead to Triumphant Return
With a clearer understanding of the trail signs, you're now better equipped to plan your adventures. Switzerland’s hiking network is vast and varied, offering something for every level, but smart planning is crucial to maximizing enjoyment and ensuring safety. Don't just show up and hope for the best; a little foresight goes a long way here.
Choosing the Right Trail for Your Level
This is perhaps the most critical step. Be honest with yourself about your fitness, hiking experience, and any fears, like vertigo. Starting with yellow-marked trails is always a good idea if you're new to Swiss hiking or haven't been active in a while. As you build confidence and fitness, you can gradually progress to white-red-white mountain trails. Never underestimate the mountains; even seemingly easy paths can become challenging in poor weather.
Utilize official resources like the SwitzerlandMobility website (schweizmobil.ch) or their app, which provides detailed maps, elevation profiles, and descriptions for thousands of trails. Cantonal tourism websites (e.g., myswitzerland.com, zuerich.com/hiking) are also fantastic for finding trails specifically suited to your preferences and location. Always check the weather forecast for the specific region and altitude you plan to visit, as conditions can vary wildly from valley to peak. Consider the season too; some trails are only accessible in summer due to snow. For longer hikes or if you're feeling a bit intimidated, consider joining a guided tour through platforms like GetYourGuide, where experienced local guides can lead you safely through stunning landscapes.
Essential Gear and Safety Considerations
Proper gear isn't just about comfort; it's about safety. For any hike beyond a leisurely yellow-marked stroll, sturdy hiking boots with good grip and ankle support are non-negotiable. Dress in layers, as mountain weather can change rapidly – pack rain gear, even if the forecast looks clear. Always carry enough water, snacks (think high-energy options like nuts and Swiss chocolate!), a fully charged phone, a power bank, a first-aid kit, and a physical map or reliable offline digital map.
It's a good practice to inform someone reliable (a friend, hotel reception, or family member) of your planned route and estimated return time. In case of an emergency, knowing the emergency numbers is vital: 144 for general medical emergencies, and 1414 for REGA (Swiss Air-Rescue), especially important in the mountains. If you're frequently in the high Alps, considering a REGA Membership: Why Expats Need Air Rescue Insurance in the Alps can provide peace of mind. Remember, the mountains are beautiful but unforgiving. Respect them, and always err on the side of caution. If you're unsure about a section or if the weather turns, it's always okay to turn back.
Public Transport and Logistical Tips
One of the greatest joys of hiking in Switzerland is the seamless integration of its public transport system. You can reach virtually any trailhead by train, bus, or even mountain cable car. This means you don't need a car to access incredible hikes, and you can plan point-to-point hikes without worrying about returning to your starting point.
Use the SBB website or app to plan your journeys. Tools like Omio can also help you find the best train and bus connections to your chosen starting point. For frequent travelers, investing in a The Half-Fare Travelcard (Halbtax): The Must-Have Pass for Swiss Residents or even a SBB Travelcards: Is the Generalabonnement (GA) Worth the CHF 4000+ Cost? can save you a significant amount on fares. Many mountain railways and cable cars also offer discounts with these passes. If your hike involves an overnight stay, booking accommodation in advance, especially during peak season, is always wise. Websites like Booking.com offer a wide range of options, from cozy mountain huts to hotels in charming alpine villages, ensuring you have a comfortable base after a long day on the trails.
Here's a quick summary of the main trail categories:
| Trail Sign Type | Difficulty | Terrain | Required Gear | Suitable For |
|---|---|---|---|---|
| Yellow | Easy – Moderate | Well-maintained paths, gentle slopes, forest, lakeside, village routes | Comfortable walking shoes, water, light jacket | Families, casual walkers, beginners, most fitness levels |
| White-Red-White | Moderate – Hard | Mountain paths, steep climbs/descents, rocky, exposed sections, alpine pastures | Sturdy hiking boots (ankle support!), layers, rain gear, water, food, first-aid, navigation (map/app), sure-footedness, good fitness | Experienced hikers, those with a good head for heights and robust fitness |
| White-Blue-White | Very Hard – Expert | Alpine routes, glaciers, rock climbing sections, via ferratas, very exposed | Mountaineering boots, climbing harness, ropes, ice axe, crampons, helmet, extreme sure-footedness, no vertigo, excellent fitness, mountain experience | Highly experienced mountaineers, often with a mountain guide |
Common Misconceptions and Expat Frustrations
Even with the best intentions and all the right information, there are still a few hurdles that can trip up new arrivals to the Swiss hiking scene. It’s okay to feel a bit overwhelmed or even frustrated; many of us have been there!
The "It's Just a Walk" Trap
One of the biggest pitfalls for expats is the misconception that all "hiking" is the same. In some countries, a hike might imply a gentle path through a national park. In Switzerland, the term "Wanderung" (hike) covers a vast spectrum, and the local definition of "easy" can sometimes be quite different from what you're used to. That yellow-marked trail might be easy, but a white-red-white one, even if only rated as "moderate," can be surprisingly demanding. I've seen countless newcomers in trainers and inappropriate clothing halfway up a mountain trail, looking utterly bewildered by the terrain.
The Swiss have an immense respect for their mountains and understand their power and potential dangers. What they consider a "Bergwanderweg" often involves significant elevation gain, uneven surfaces, and exposure that would be classified as much harder elsewhere. It’s a common expat frustration to feel a bit out of depth even on a supposedly "easy" mountain trail. Don't be ashamed to start slow, build your experience, and remember that even a simple walk along a lake in Switzerland offers views that rival major treks elsewhere. Distinguish between a "Spaziergang" (a stroll or leisurely walk) and a proper "Wanderung," and equip yourself accordingly. Your feet (and your ego) will thank you.
Language Barriers on Signs
While the color codes and hiker symbols are wonderfully universal, the specific names of peaks, passes, and villages on the signs will, of course, be in the local language – German, French, or Italian, depending on the canton. This can sometimes add an extra layer of challenge, especially at complex junctions with many arrows pointing in different directions. You might be looking for "Gipfelkreuz," but the sign might just say "Kreuz."
Furthermore, while core safety messages are often universal (like the aforementioned "Weg gesperrt"), more nuanced warnings might be solely in the local language. Knowing basic directional terms (e.g., "links" for left, "rechts" for right, "geradeaus" for straight ahead) can be helpful, but it's even more crucial to ensure that the destination name on your map matches exactly what's on the sign. Using a translation app can be a lifesaver in a pinch, but nothing beats familiarizing yourself with the local geography beforehand. This is where those Hiking Apps for Switzerland: SwitzerlandMobility and Komoot become even more indispensable, as they often have the trail names and points of interest in multiple languages, allowing you to cross-reference with confidence.
Navigating the Swiss hiking system can seem complex, but once you understand the color-coded language of the trail signs, an incredible world of natural beauty opens up to you. Take your time, plan wisely, respect the mountains, and most importantly, enjoy every breathtaking step!
Disclaimer
Please note that while this guide provides comprehensive information, hiking in the mountains always carries inherent risks. Weather conditions can change rapidly, and trail conditions may vary. Always exercise caution, prepare adequately, and assess your own capabilities before embarking on any hike. The information provided here is for general guidance only and should not replace professional advice or local warnings.